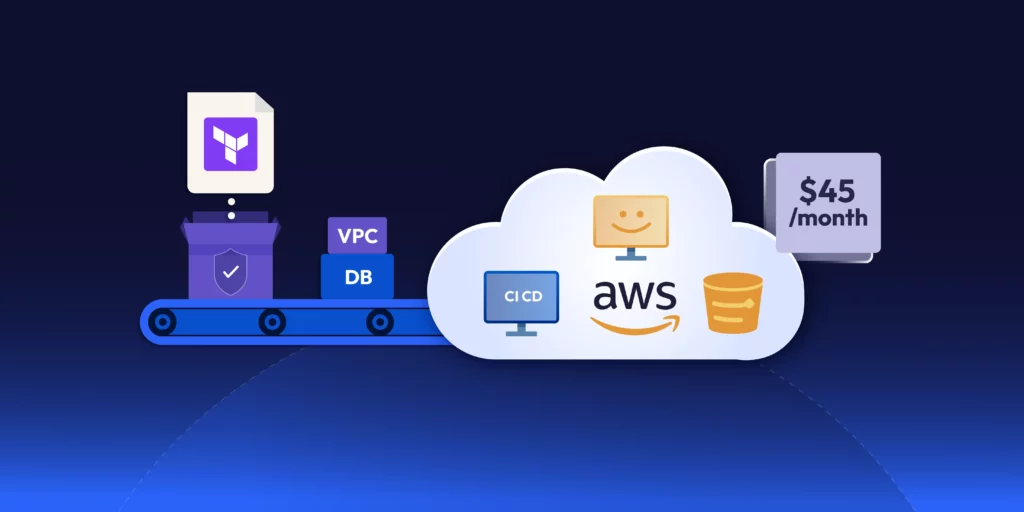
If you’ve worked with AWS, you’ve likely had to provision cloud infrastructure — maybe databases, storage buckets, or compute instances. Many teams start by using the AWS Console for these tasks. But manual provisioning doesn’t scale — especially when managing multiple environments like development, QA, staging, and production. That’s where Self-Service Terraform AWS workflows come in — enabling teams to provision infrastructure autonomously, securely, and at scale.
That’s where Self-Service Terraform AWS comes in. By integrating Infrastructure as Code (IaC) principles with Terraform’s HCL scripting, teams can create reusable and modular infrastructure that scales reliably across different environments.
In this guide, we’re going to explore how to set up Self-Service Terraform AWS environments. We’ll also cover how to incorporate Git workflows, CI/CD pipelines, and cost governance into your provisioning strategy.
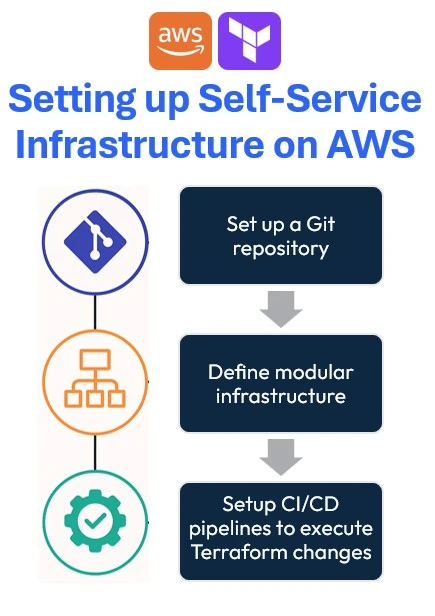
Setting up Self-Service Infrastructure on AWS
Setting up Self-Service Terraform AWS infrastructure helps provision resources autonomously, securely, and consistently. These are the steps you would have to follow:
- Set up a Git repository
- Define modular infrastructure
- Setup CI/CD pipelines to execute Terraform changes
Set up a Git repository
Start creating a Git repository using services like GitHub, GitLab, or Bitbucket to track and version control Terraform code. This helps teams to manage all changes made to the cloud infrastructure over time.
Additionally, it automates the provisioning of the infrastructure using CI/CD for Terraform.
Define modular infrastructure
It’s important to create the Terraform code for better readability and long-term maintenance. Defining modular infrastructure involves breaking down infrastructure resources into reusable Terraform modules, each encapsulating specific AWS components like VPCs, EC2 instances, or RDS databases.
By using Terraform modules, teams can abstract complex configurations to easily deploy consistently across multiple environments (development, staging, production).
Setup CI/CD pipelines to execute Terraform changes
Creating a pipeline to execute Terraform changes involves automating infrastructure deployments. You can either build (and maintain) pipelines on your ownusing CI/CD tools such as GitHub Actions, and AWS CodePipeline or you can use a dedicated tool for that.
We believe that software-dedicated pipelines are not good enough for infrastructure.
These pipelines automate the complete Terraform lifecycle:
- Initialization
- Validation
- Planning
- Applying configurations automatically upon each code commit.
For large-scale cloud environments, set up an AWS Terraform infrastructure governance tool integrated into your pipeline for continuous infrastructure drift detection and validation.
This ensures infrastructure changes are thoroughly tested and reviewed before deployment, preventing errors or configuration drift.
Implementing Self-Service Terraform AWS Environments
Start by creating an IAM User and a Secret access key with the necessary permission to provision your infrastructure in AWS. After that, proceed with the next section.
Step 01: Initialize Terraform AWS Boilerplate for Self-Service
In this article, let’s create one module infrastructure component – DynamoDB, and maintain one environment – Development. To do so, create the folder structure showcased below:
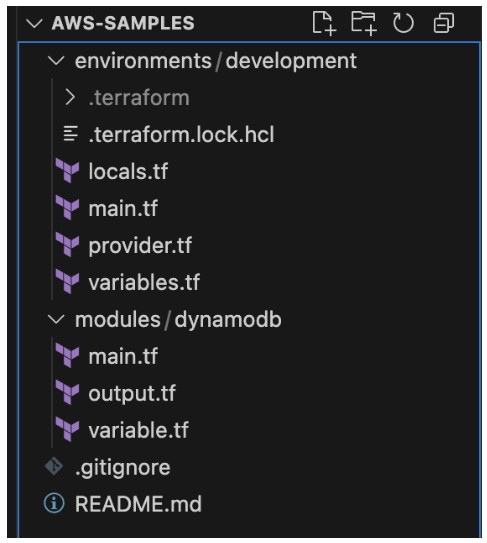
The project structure enforces self-service:
- environments/ keeps each deployment (dev, staging, prod) isolated—so you don’t accidentally apply prod changes to dev.
- modules/ houses composable building blocks you can reuse (e.g. your DynamoDB module) across environments.
- A clean root with .gitignore & README.md helps onboard new team members.
Step 02: Defining self-service infrastructure
You can define the providers for your infrastructure. In this case, you’ll need to configure the AWS provider with S3 backed state:
|
1 2 3 4 5 6 7 8 9 10 11 12 13 14 15 16 17 18 |
terraform { required_providers { aws = { source = "hashicorp/aws" version = "~> 4.16" } } backend "s3" { bucket = "lakindus-terraform-state-storage" key = "development/terraform.tfstate" region = "us-east-1" } required_version = ">= 1.2.0" } provider "aws" { region = "us-east-1" } |
Note: Ensure that the S3 bucket that you are using to manage your Terraform State is already created.
Next, you’ll need to define your tags that can help better track your infrastructure. Part of building a self-service infrastructure is to keep reusability and maintainability high. To do so, you can define your tags as a local variable scoped to your particular development environment, like so:
|
1 2 3 4 5 6 |
locals { tags = { ManagedBy = "Terraform" Environment = "Development" } } |
Next, you can specify these tags by referencing locals.tags onto any resource you wish to tag.
Afterwards, you can start defining the module for DynamoDB. You’ll see three files:
- main.tf: This holds the resource declaration
- output.tf: This holds any output that will be generated from the resource
- variable.tf: This defines all inputs required to configure the resource.
For instance, to provision a DynamoDB table, you’ll need:
- Table name
- Tags
- Hash key
- Range key
- GSIs
- LSIs
- Billing Mode
- Provisioned capacity – if billing mode is PROVISIONED
To accept these values, you can define the variables for the module:
|
1 2 3 4 5 6 7 8 9 10 11 12 13 14 15 16 17 18 19 20 21 22 23 24 25 26 27 28 29 30 31 32 33 34 35 36 37 38 39 40 41 42 43 44 45 46 47 48 49 50 51 52 53 54 55 56 57 58 59 60 61 62 63 64 65 66 67 68 69 70 71 72 73 74 75 76 77 78 79 80 81 82 83 84 85 86 87 88 89 90 91 92 93 94 95 96 97 98 99 100 101 102 103 |
variable "table_name" { description = "The name of the DynamoDB table" type = string } variable "hash_key" { description = "The name of the hash key" type = string } variable "hash_key_type" { description = "The type of the hash key: S | N | B" type = string default = "S" } variable "range_key" { description = "The name of the range key (optional)" type = string default = "" } variable "range_key_type" { description = "The type of the range key: S | N | B" type = string default = "S" } variable "billing_mode" { description = "Billing mode: PROVISIONED or PAY_PER_REQUEST" type = string default = "PROVISIONED" } variable "read_capacity" { description = "Read capacity units (for PROVISIONED mode)" type = number default = 5 } variable "write_capacity" { description = "Write capacity units (for PROVISIONED mode)" type = number default = 5 } variable "global_secondary_indexes" { description = "List of global secondary index definitions" type = list(object({ name = string hash_key = string range_key = optional(string) projection_type = string non_key_attributes = optional(list(string)) read_capacity = optional(number) write_capacity = optional(number) })) default = [] } variable "tags" { description = "Tags to apply to the DynamoDB table" type = map(string) default = {} } Next, you can define the module: resource "aws_dynamodb_table" "this" { name = var.table_name billing_mode = var.billing_mode hash_key = var.hash_key range_key = var.range_key == "" ? null : var.range_key attribute { name = var.hash_key type = var.hash_key_type } dynamic "attribute" { for_each = var.range_key == "" ? [] : [var.range_key] content { name = range_key.value type = var.range_key_type } } dynamic "global_secondary_index" { for_each = var.global_secondary_indexes content { name = global_secondary_index.value.name hash_key = global_secondary_index.value.hash_key range_key = lookup(global_secondary_index.value, "range_key", null) projection_type = global_secondary_index.value.projection_type non_key_attributes = [global_secondary_index.value.non_key_attributes] read_capacity = lookup(global_secondary_index.value, "read_capacity", var.read_capacity) write_capacity = lookup(global_secondary_index.value, "write_capacity", var.write_capacity) } } read_capacity = var.billing_mode == "PAY_PER_REQUEST" ? null : var.read_capacity write_capacity = var.billing_mode == "PAY_PER_REQUEST" ? null : var.write_capacity tags = var.tags } |
Next, you can define the module:
|
1 2 3 4 5 6 7 8 9 10 11 12 13 14 15 16 17 18 19 20 21 22 23 24 25 26 27 28 29 30 31 32 33 34 35 36 37 |
resource "aws_dynamodb_table" "this" { name = var.table_name billing_mode = var.billing_mode hash_key = var.hash_key range_key = var.range_key == "" ? null : var.range_key attribute { name = var.hash_key type = var.hash_key_type } dynamic "attribute" { for_each = var.range_key == "" ? [] : [var.range_key] content { name = range_key.value type = var.range_key_type } } dynamic "global_secondary_index" { for_each = var.global_secondary_indexes content { name = global_secondary_index.value.name hash_key = global_secondary_index.value.hash_key range_key = lookup(global_secondary_index.value, "range_key", null) projection_type = global_secondary_index.value.projection_type non_key_attributes = [global_secondary_index.value.non_key_attributes] read_capacity = lookup(global_secondary_index.value, "read_capacity", var.read_capacity) write_capacity = lookup(global_secondary_index.value, "write_capacity", var.write_capacity) } } read_capacity = var.billing_mode == "PAY_PER_REQUEST" ? null : var.read_capacity write_capacity = var.billing_mode == "PAY_PER_REQUEST" ? null : var.write_capacity tags = var.tags } |
As shown above, you now have a blueprint for a DynamoDB table that anyone can use to create a table. By doing so, you enforce consistency in your project. Different developers can provision a table using this module and guarantee the same configurations to be applied.
Finally, you can define your outputs:
|
1 2 3 4 5 6 7 8 9 10 11 12 13 14 15 16 17 18 19 |
utput "table_name" { description = "The name of the DynamoDB table" value = aws_dynamodb_table.this.name } output "table_arn" { description = "The ARN of the DynamoDB table" value = aws_dynamodb_table.this.arn } output "hash_key" { description = "The hash key name" value = aws_dynamodb_table.this.hash_key } output "range_key" { description = "The range key name" value = try(aws_dynamodb_table.this.range_key, "") } |
This helps you access values that will be made available only upon resource creation.
Finally, you can provision the resource by configuring the module in your main.tf :
|
1 2 3 4 5 6 7 8 |
module "db" { source = "../../modules/dynamodb" table_name = "sample-table" billing_mode = "PAY_PER_REQUEST" hash_key = "id" hash_key_type = "S" tags = local.tags } |
As shown above, it’s extremely simple to create a table using the module. You don’t need to define the resource and all the properties every single time. All you need to do is fill in the input variables defined in your module.
Final Step: CI/CD for Self-Service Terraform AWS Deployments
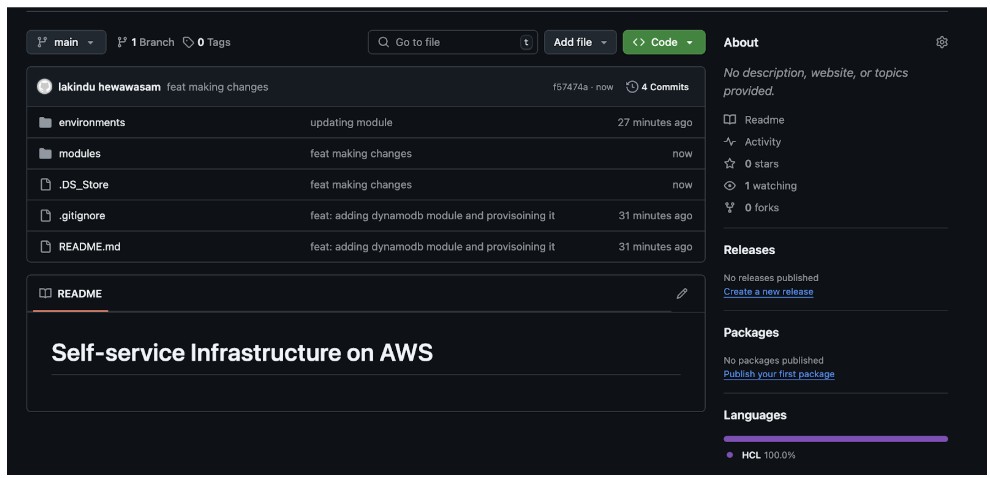
Once you’re ready to provision the infrastructure, you can push changes to your repository:
Next, you will need to create the following:
- GitHub Actions Workflow to deploy your changes using CI/CD
- IAM Service Role that authenticates via OIDC to help the GitHub Runner communicate with AWS.
Note: To learn about creating an OIDC Role with AWS, check this out.
Once you’ve created an IAM Role that can be assumed using OIDC, you can create the following GitHub Workflow:
name: Terraform Deployment with AWS OIDC
|
1 2 3 4 5 6 7 8 9 10 11 12 13 14 15 16 17 18 19 20 21 22 23 24 25 26 27 28 29 30 31 32 33 34 35 36 37 38 39 40 41 42 43 44 45 46 47 48 49 50 |
name: Terraform Deployment with AWS OIDC on: push: branches: - main pull_request: permissions: id-token: write # Needed for OIDC token contents: read # To checkout code jobs: terraform: name: Terraform OIDC Deploy runs-on: ubuntu-latest env: AWS_REGION: us-east-1 steps: - name: Checkout Repository uses: actions/checkout@v4 - name: Configure AWS Credentials via OIDC uses: aws-actions/configure-aws-credentials@v4 with: role-to-assume: ${{ secrets.AWS_ROLE_ARN }} aws-region: ${{ env.AWS_REGION }} - name: Change Directory to Environment run: cd environments/development - name: Setup Terraform uses: hashicorp/setup-terraform@v3 with: terraform_version: "1.7.4" - name: Terraform Init run: terraform init working-directory: environments/development - name: Terraform Plan run: terraform plan -out=tfplan working-directory: environments/development - name: Terraform Apply if: github.ref == 'refs/heads/main' run: terraform apply -auto-approve tfplan working-directory: environments/development |
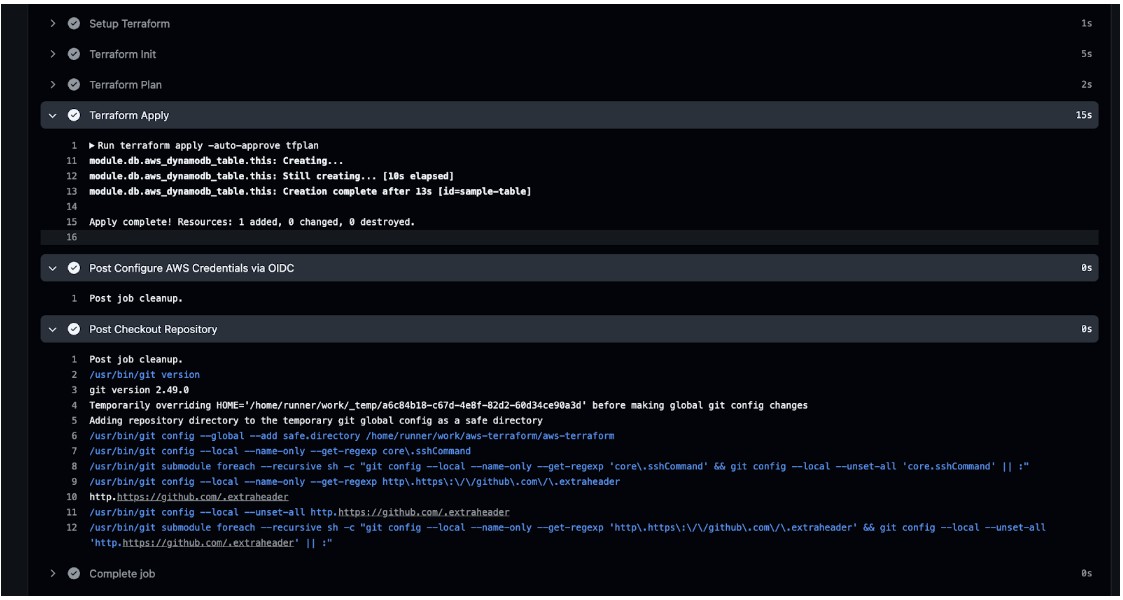
With this workflow, the GitHub actions workflow will:
- Assume the IAM role using OIDC
- Perform a Terraform plan and auto apply the changes.
After you run it, you should see the status in the GitHub actions workflow:
Next, you can view your resource in the AWS Console:

And that’s all you need. Next, all your pushes to the repository will trigger plans that will be applied automatically.
Pricing & cost management
After you start managing infrastructure with Self-Service Terraform AWS, it’s important to understand the techniques to adopt to efficiently manage costs:
1. Enforce Consistent Tagging for Cost Allocation
Tag every resource with a common set of metadata so AWS Cost Explorer and your billing reports can slice & dice by team, project or environment.
|
1 2 3 4 5 6 7 8 9 10 11 12 13 14 15 16 17 18 19 |
# variables.tf variable "common_tags" { type = map(string) default = { Project = "my-app" Environment = "dev" Owner = "team-backend" } } # main.tf (example) resource "aws_dynamodb_table" "users" { # … table settings … tags = merge( var.common_tags, { Name = "users-table" } ) } |
Benefits:
- Chargeback/showback by team or cost center
- Easily filter unused or mis-tagged resources
2. Shift-Left Cost Estimation with Infracost
Catch cost surprises during code review by integrating an open-source estimator like Infracost.
Install & configure infracost
brew install infracost
infracost setup –aws-project=your-aws-credentials-file
Generate a cost report
infracost breakdown --path=./environments/dev \ --format=json --out-file=infracost.json
Embed in CI (e.g. GitHub Actions) to comment on pull requests with line-item delta.
That way every Terraform change shows you “this will add ~$45/month.” This helps teams take a more proactive approach to cost management.
3. Automate Cleanup of Ephemeral Resources
This is critical for Self-Service Terraform AWS pipelines where dev environments are short-lived it Prevent “zombie” resources from quietly racking up bills. To do so, you can:
- Leverage Terraform workspaces or separate state buckets for short-lived environments.
- Use CI/CD triggered destroys for feature branches. This helps remove unnecessary costs that could incur for infrastructure created for feature branches.
- TTL tags + Lambda sweeper: tag dev stacks with a DeleteAfter=2025-05-12T00:00:00Z and run a daily Lambda that calls AWS APIs (or Terraform) to tear down expired resources.
- Drift & Orphan Detection: Regularly run terraform plan in a scheduler to detect resources that exist in AWS but not in state, then review and remove them.
4. Tie into AWS Cost Controls
Even with perfect tagging and cleanup, you need guardrails:
- AWS Budgets & Alerts: Create monthly budgets per tag group (e.g. Project=my-app) with email or SNS notifications.
- Cost Anomaly Detection: Enable AWS Cost Anomaly Detection to catch sudden spikes.
Securing Self-Service Terraform AWS Projects
In addition to cost management, you’d need to consider best practices for securely managing your infrastructure with Terraform. To do so, you can leverage the following:
1. Enforce Least-Privilege IAM
Always provision IAM roles using principles of least privilege. This means that you should only define access control policies for actions that a user will perform.
Additionally, consider using IAM Assume Role rather than access keys as the tokens are not long-lived. By doing so, any leaks in credentials will not result in a large-scale attack as the credentials will expire quickly.
2. Secure & Version Terraform State
Consider managing your state in DynamoDB consistency control with encryption in rest and in transit using KMS Keys. By doing so, you ensure security in your Terraform state.
Concluding Thoughts
Building Self-Service Terraform AWS environments is a powerful way to scale cloud provisioning while keeping control in the hands of your developers. With the right modular approach, CI/CD pipelines, and cost visibility, you can eliminate bottlenecks and reduce operational overhead.
Want to take it further?
ControlMonkey brings intelligence and automation to every step of your Self-Service Terraform AWS lifecycle. From AI-generated IaC modules to drift detection and policy enforcement, we help you govern infrastructure without slowing down innovation.
👉 Book a Self-Service Terraform AWS demo to see how ControlMonkey simplifies Terraform at scale.

FAQs
Self-Service Terraform on AWS enables developers and DevOps teams to provision infrastructure—like VPCs, databases, or compute—without waiting on central platform teams. By using Terraform modules, version-controlled Git repositories, and CI/CD pipelines, organizations can scale infrastructure provisioning securely and consistently across environments.
To secure Self-Service Terraform AWS environments, use IAM Assume Roles instead of long-lived access keys, enforce least-privilege permissions, and store state securely in S3 with encryption and DynamoDB state locking. You should also integrate drift detection and apply guardrails via CI/CD pipelines for safer deployments.
Yes. ControlMonkey automates every step of the Self-Service Terraform AWS lifecycle – from generating reusable Terraform modules to enforcing policies, detecting drift, and integrating with your CI/CD workflows. It’s designed to give DevOps teams autonomy without sacrificing governance, visibility, or security.